This article will show you, how to set up a FTP push to the Solytic portal. This guidiance will not work with SolarLog Base models.
- Make sure that your SolarLog data logger is connected via ethernet cable with your computer.
- Open your internet browser and type http://solar-log in the adress line and confirm with ENTER.
There are to different variants of the interface:
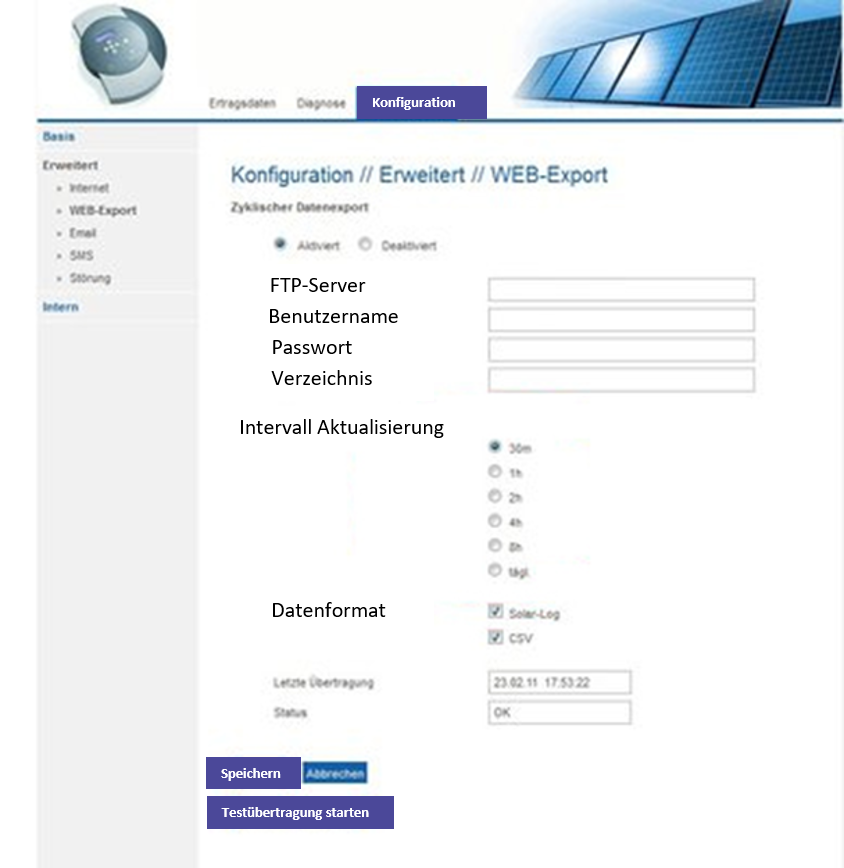
Old SolarLog interface:

- Navigate to Configuration> Advanced> WEB Export
- Activate the cyclical data export
- Enter gateway.solytic.com under FTP server
- Enter the data received from our email under username and password
- Please leave the directory empty
- Set the smallest time interval under Update interval
- Please select the data format Solar-Log and CSV
- Save and then click start test transmission
- Contact Solytic
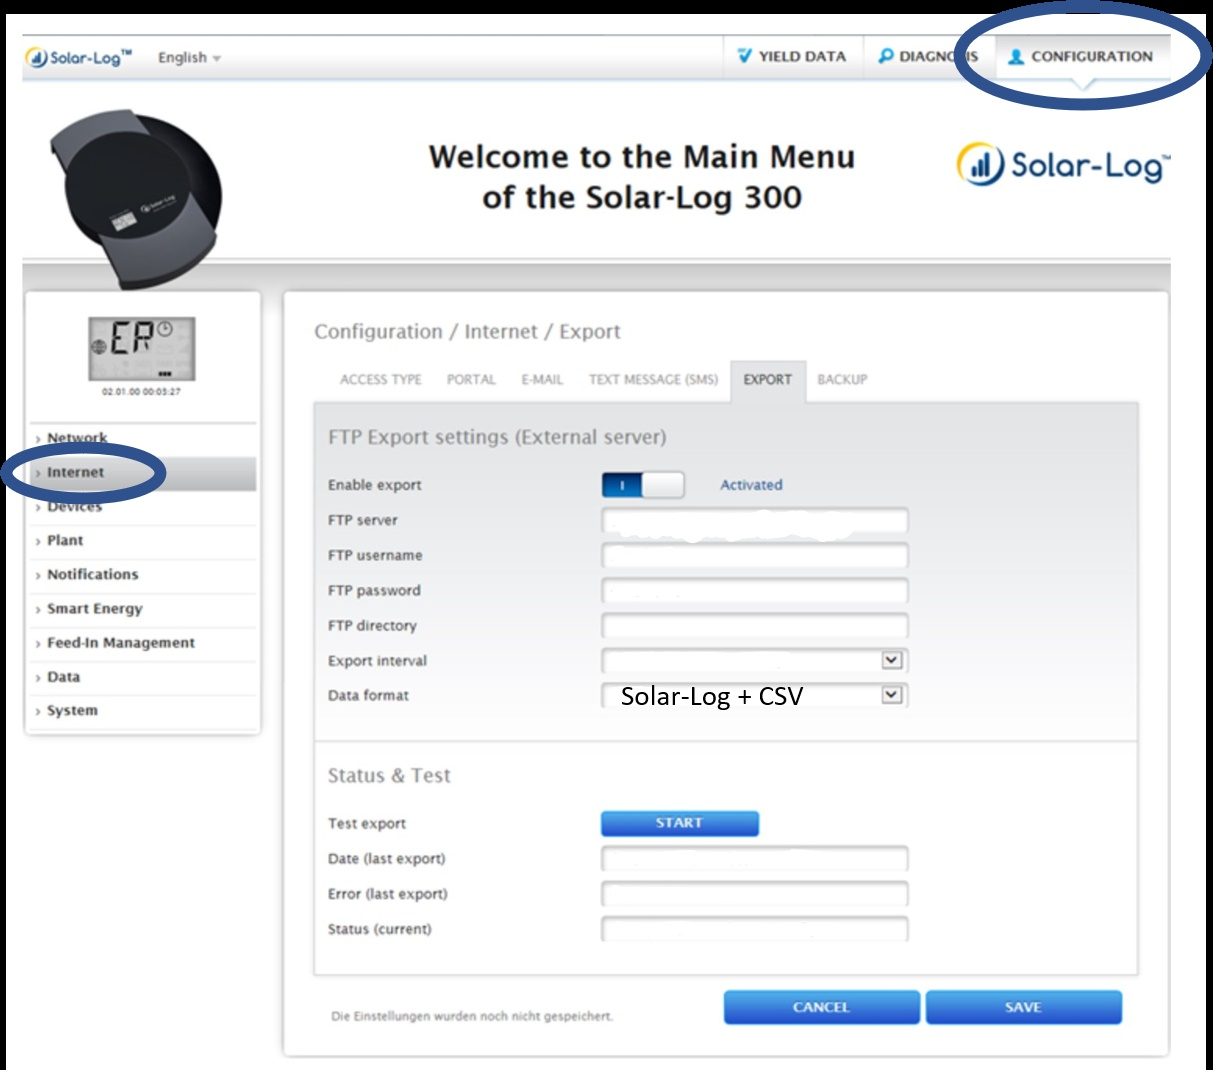
New SolarLog interface:
- Navigate to CONFIGURATION in the upper right corner, then click Network>Export
- Enter gateway.solytic.com under FTP server
- Enter the data provided by Solytic
- Please leave the directory empty
- Set the smallest time interval under export interval
- Please select the data format Solar-Log + CSV
- Klick on START next to test export
- Please save your configuration
- Contact Solytic
