This article describes the process of self-onboarding in a chronological sequence.
- After you have received the activation email, you can activate your account by clicking on the activation link in the email.
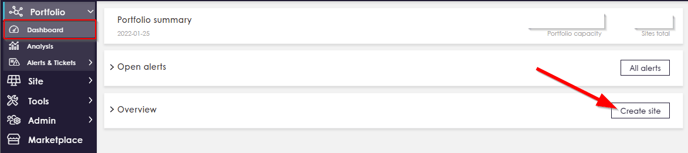
- Once the account is activated, you can create the first site in the portal. Navigate in the menu on the left to Portfolio > Dashboard. In the portfolio dashboard, click on "Create site" (see image).
You can find a detailed description with a video here. - In order to connect your PV site with the portal, a data source needs to be created.
Navigate to the site for which a new data source should be added.
Navigate in the menu on the left to Configuration > Datasources (see image).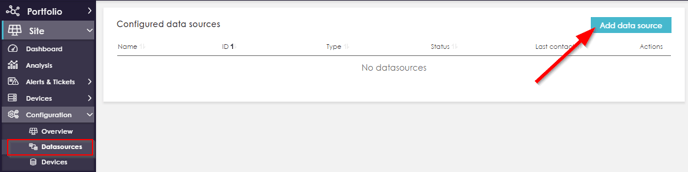
You can find a detailed description with a video here. - To establish a connection to the portal, a data transfer needs to be set up. Instructions for your hardware can be found here.
After completing the 4 onboarding steps, your PV system is live.
To allow more people to access your portfolio, you can add users. You can find a detailed description with a video here.